
Show me the money! A guided tour of pricing in Sitecore Commerce 8.2.1

So you’ve set up your product templates in Commerce Server, synced them up to Sitecore Commerce, and finally set up some products in the Merchandising Manager. You see a field for list price on your products, a section for pricing, and a magical ‘Price Card’ dropdown . Price what?
Price Cards, in a nutshell, are a way to create date/time based snapshots of product Sell Price that may be applied to a single item or multiple sellable items.
A collection of Price Cards forms a Price Book. Price Books, along with Promotion Books (which will be covered in another post) are the heart of the Pricing & Promotions module of Sitecore Commerce.
Let’s get to it and see how to set up and use a Price Card.
Create new Price Book
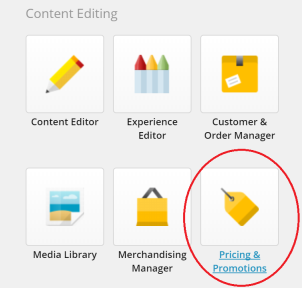
Open Pricing & Promotions from the Sitecore Launchpad. Create a new Price Book by clicking on the ‘Add’ button.
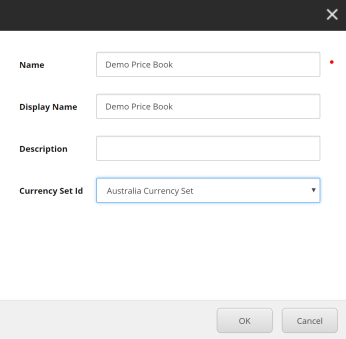
Once a Price Book is created, it must be associated with a catalog.
Note that a price book may be associated to multiple catalogs.
Add a Price Card
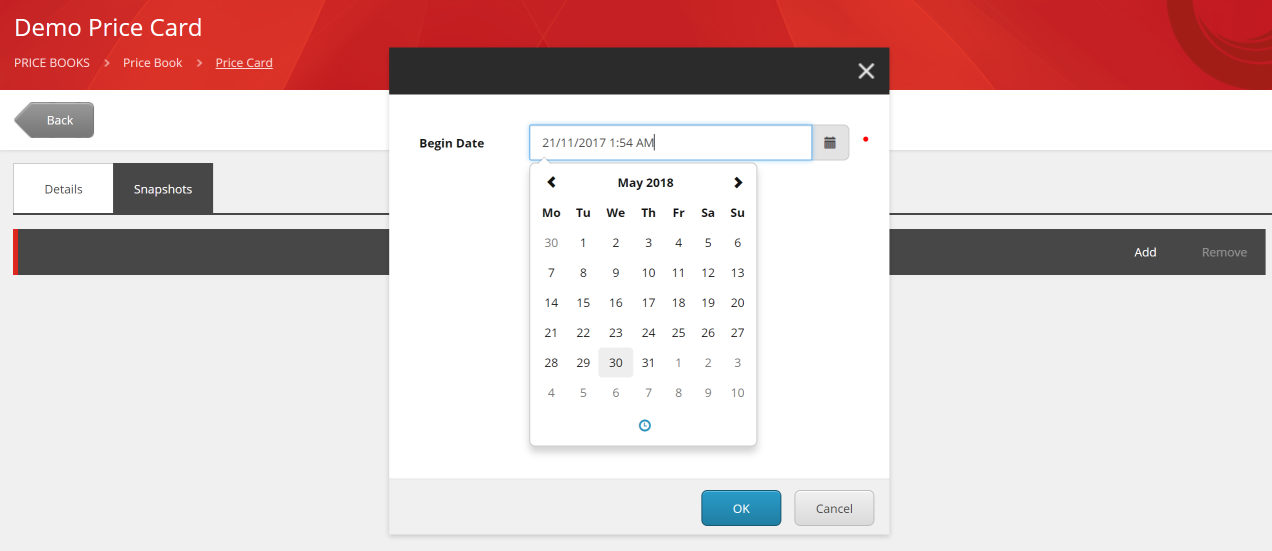
In the Price Cards section on the Price Book, click on ‘Add’ to create a new Price Card. You will notice that a Price Card is composed of Snapshots. Each snapshot defines a set of prices for a product. When you create a snapshot, you must specify a start date and time from when it is valid.
Note that if you want to add multiple snapshots, a new snapshot must have a start date later than the latest start date of all existing Snapshots.
Once a snapshot is created, there are two relevant sections:

- You can add Tags to the snapshot. When tags are added, the Price Card is linked to items (products/variants) that have the same tags.
- Set unit/tier based pricing for each currency. But wait a minute- all I see is ‘No data to display’.
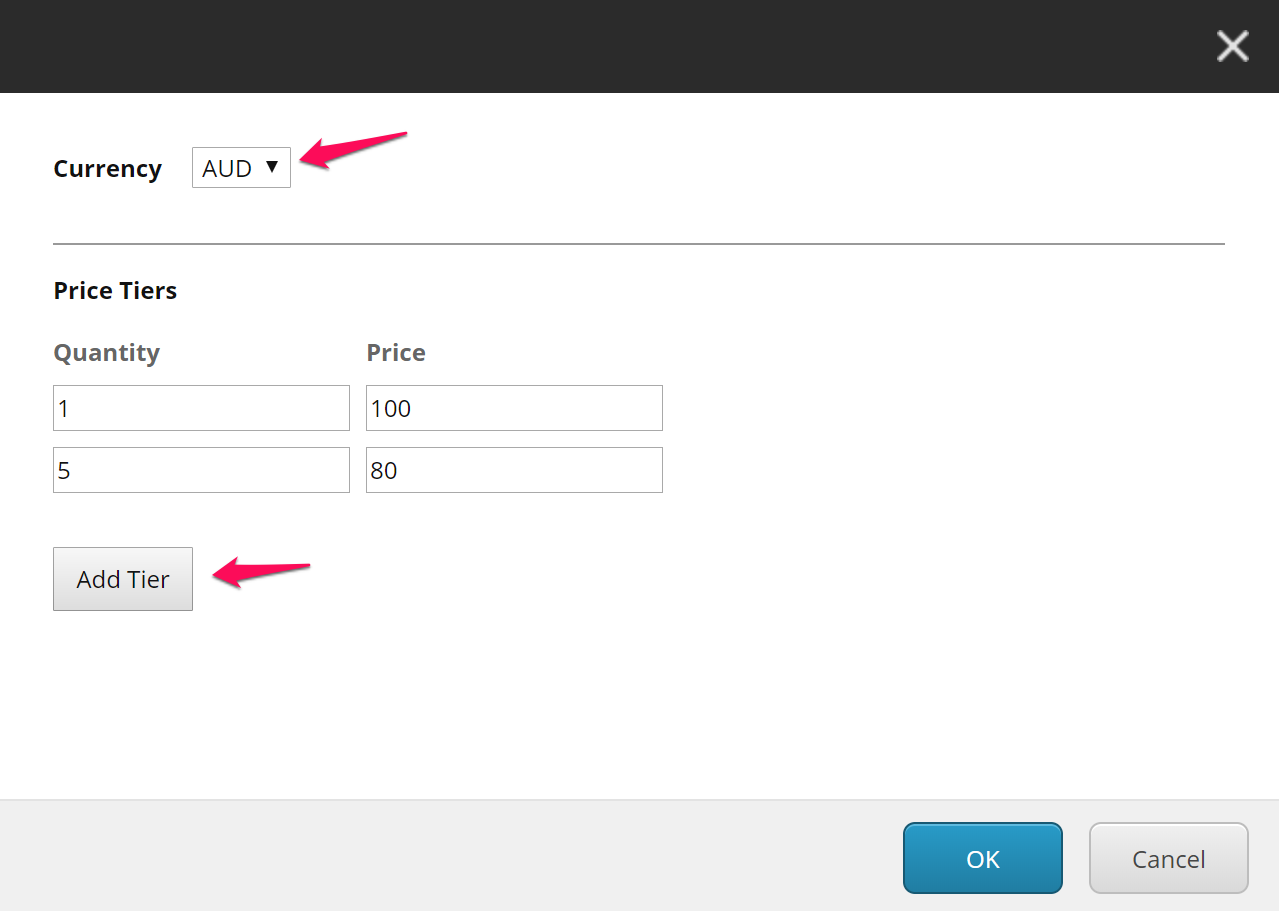
The UX is a bit off here- it took some fiddling around to figure out how to add pricing. Click on the arrow in the top right of the snapshot and click on ‘Add’.

This brings up a screen where you can select your desired currency, and pricing for items in that currency. Here, you can also set Tiered pricing by setting different prices based on the number of units bought. E.g. in the example below, if a customer buys 1 unit, the price per unit will be 100 AUD and if they buy 5 units, the price per unit will be 80 AUD.
Note that you need to add pricing for each currency individually.
Associate Price Card to product
Great! So now that you have set up your Price Card, you need to associate it to a product. This must be done individually at the product and/or variant level.
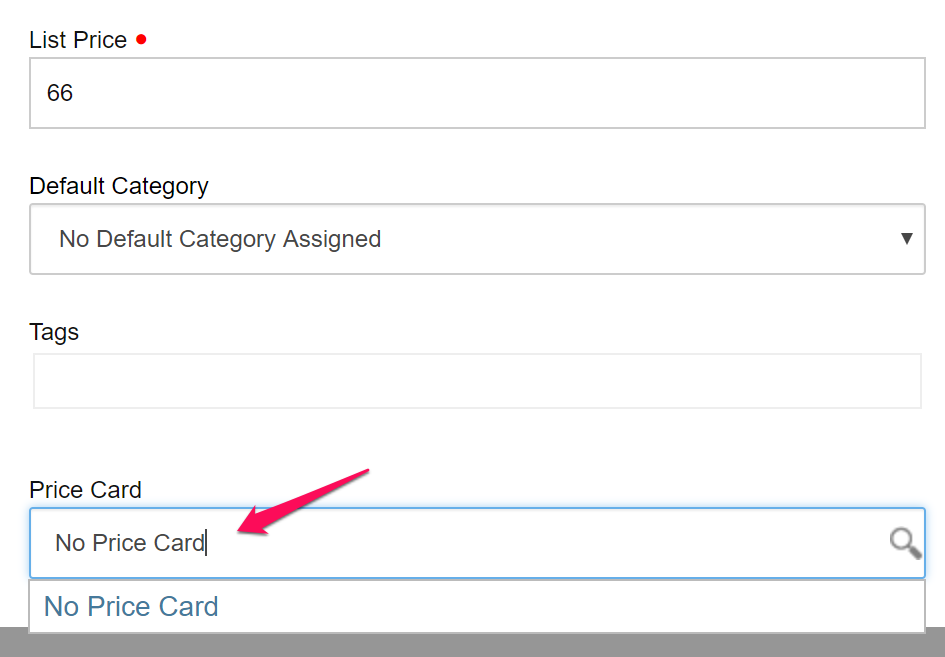
Open the Merchandising Manager from Sitecore Launchpad, and navigate to the product you want to associate the Price Card with. In the Details tab, select the Price Card to apply to the product.
Note that when you click on the Price Card text box, you don’t see a list of options- all you get is ‘No Price Card’. In order to select a a Price Card, you must start typing to search for it (I would have preferred a dropdown as well with the most recently created Price Cards). If you still don’t see it, make sure you have associated your Price Book to the correct catalog.

Save your product after selecting your Price Card and you’re done!
Stay tuned and hit the subscribe button- in future posts I will be showing you how to set up promotions and how to render all this price data on your website.