How to Integrate Azure AD with Sitecore Content Management in 10 Easy Steps

This guide is split up into 3 sections- the first section lists down steps to configure Azure Active Directory (AD), the second section goes through configuration of Sitecore Identity Server, and the last section covers the configuration of Sitecore Content Management (CM) instance.
Azure AD
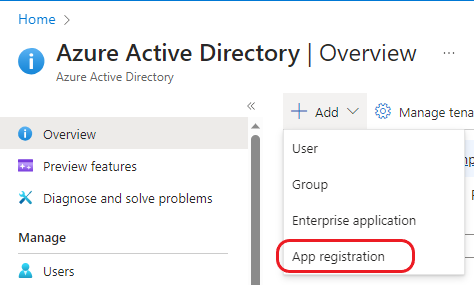
1. Create New App Registration
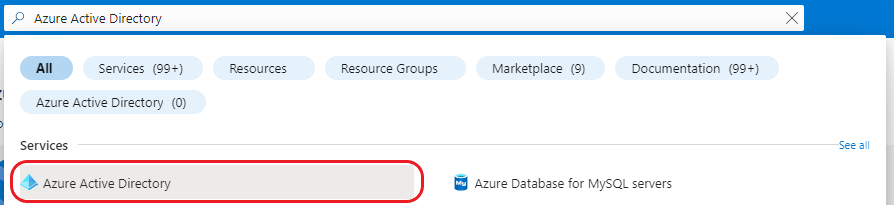
Navigate to Azure Active Directory in the Azure Portal:
Register new app:
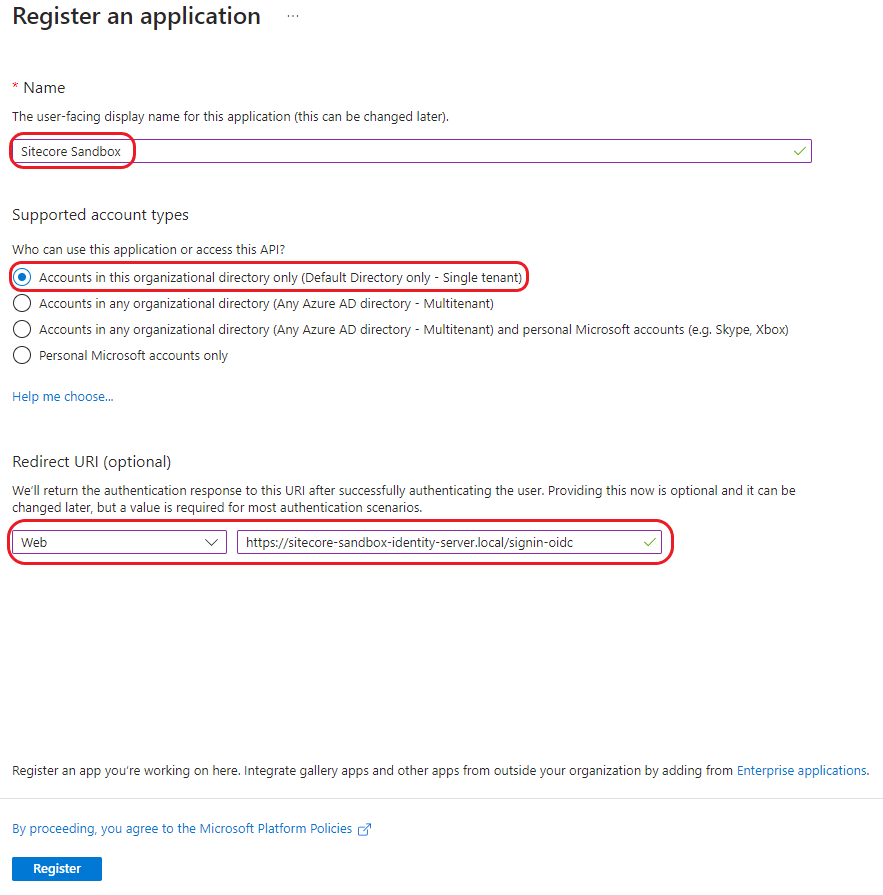
Enter app details:
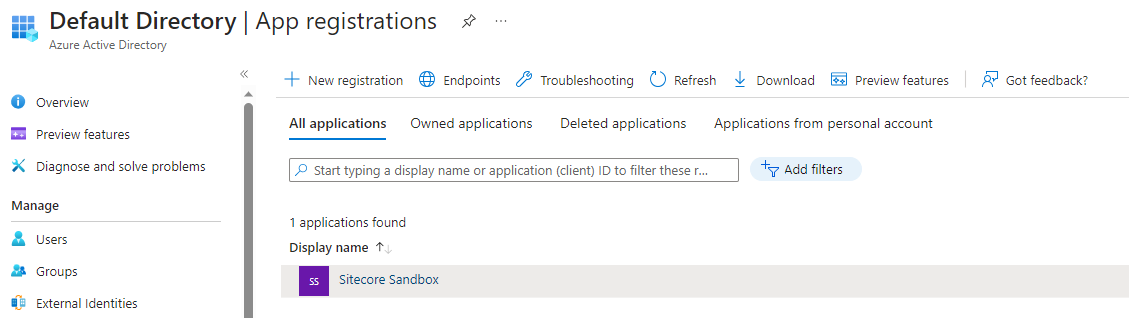
Once you register the application, you can view it under the App Registrations menu.
2. Update Manifest
Click on the new application you just created and locate the Manifest option on the menu. Update the group membership claims value as follows:
"groupMembershipClaims": "SecurityGroup"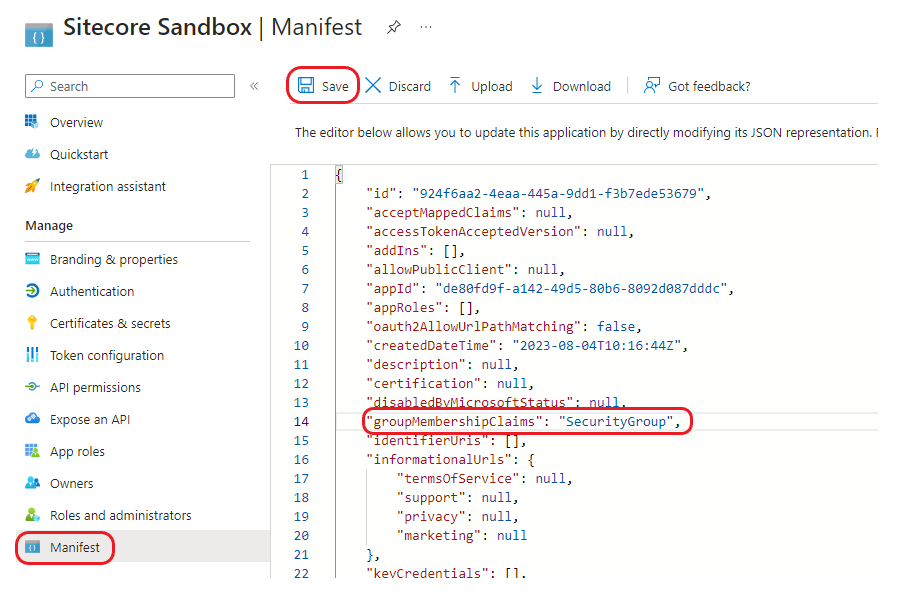
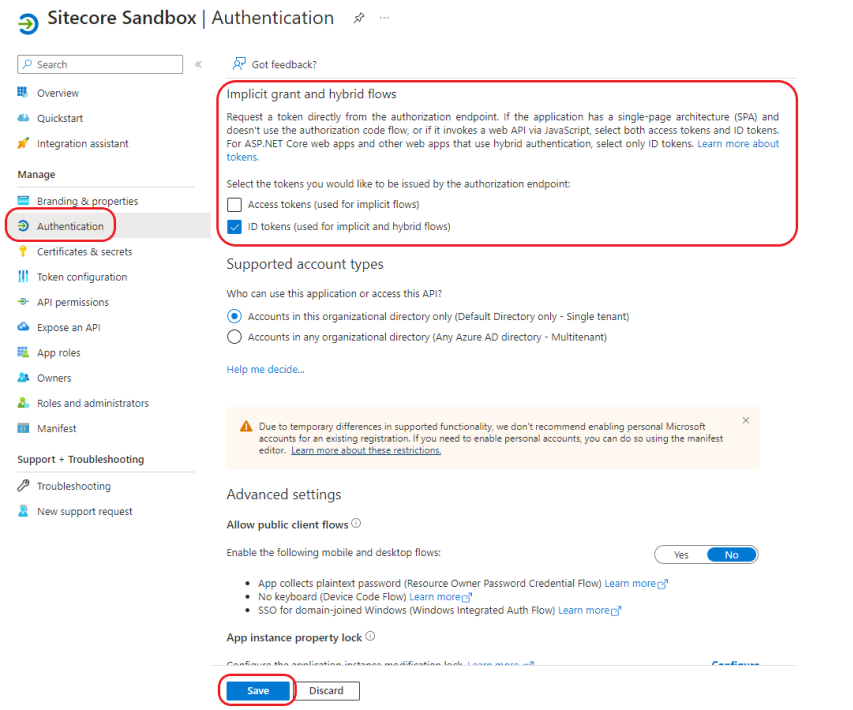
3. Enable ID Tokens for Implict Grants
Tick the ID tokens option under the Implict grant and hybrid flows section:
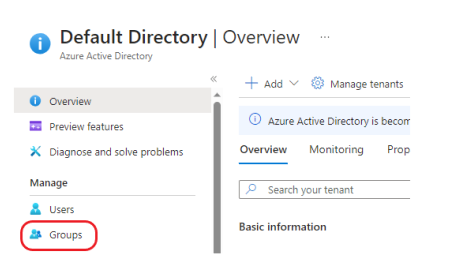
4. Create New Groups
Go back your Active Directory overview page and locate the Groups section:
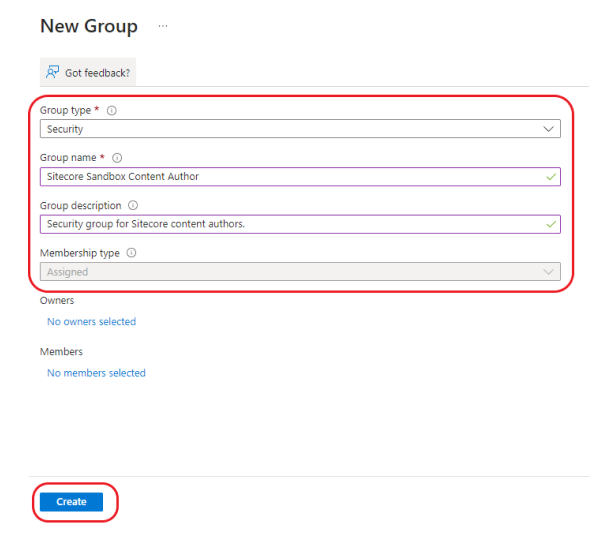
Click on New Group:

Select 'Security' for the Group type and enter the details for your new group and hit create:
Note: Groups created here correspond to your Sitecore security roles.
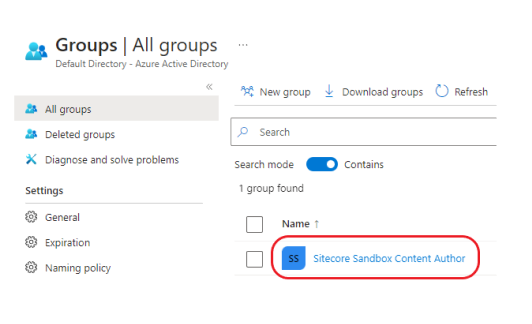
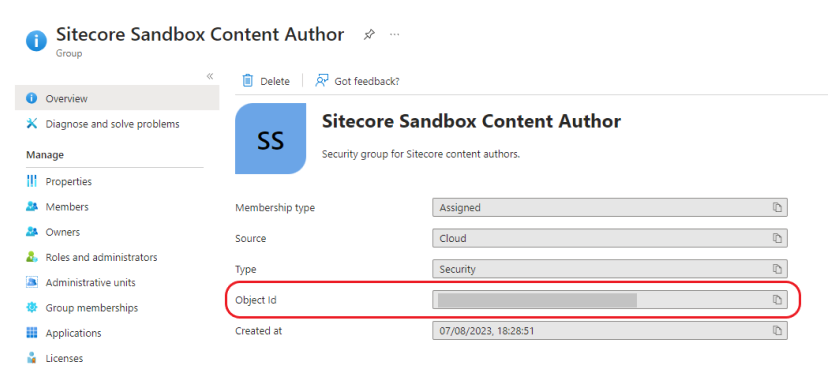
Once created, take note of the Group Object ID- this will be used in step
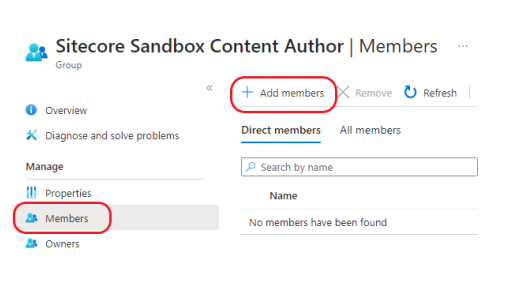
5. Add Users to the Groups
Locate your newly created group:
Copy the Object ID of this newly created group. This will be used to map the Azure AD group the corresponding Sitecore Security role in later on in step 8:

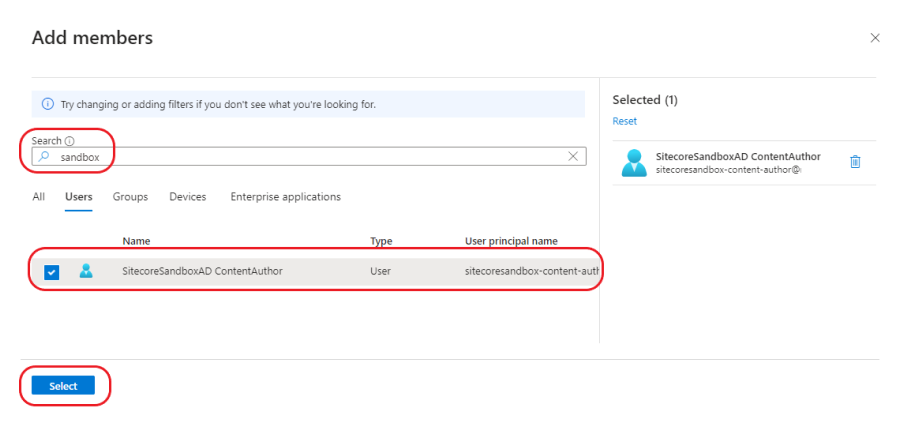
Add users:
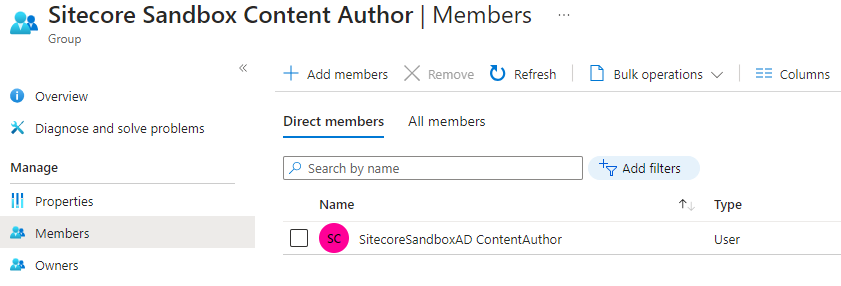
Confirm the user has been added:
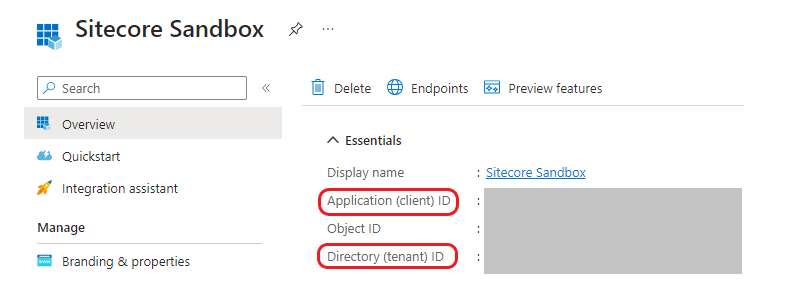
6. Copy Client ID and Tenant ID
Copy the Client Id and Tenant ID from the application overview page for the application your registered in step 1. This will used for AD configuration on the Sitecore end:
Sitecore Identity Server
7. Enable AD and Update Client ID and Tenant ID
Navigate to the the following path on your installed Sitecore Identity Server:
<your-identity-server-root>\sitecore\Sitecore.Plugin.IdentityProvider.AzureAd\Config
You'll see the following files:
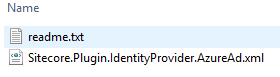
Notice the following instructions in readme.txt:
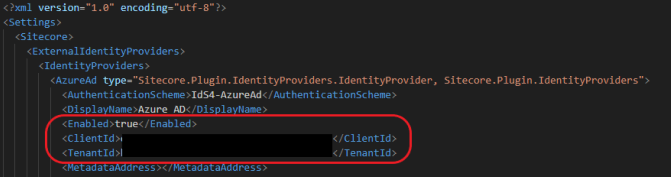
1. To enable Azure AD provider set the following setting to true Settings:Sitecore:ExternalIdentityProviders:IdentityProviders:AzureAd:Enabled.
2. Fill in ClientId, TenantId in the config.
3. Optional: add transformation rules to the ClaimsTransformations node.
Let's go ahead and follow the instructions. Open the following file, and set Enabled to true under Azure AD. Also, update the file with the Client ID and TenantID obtained from the Azure portal in step 6 :
Sitecore.Plugin.IdentityProvider.AzureAd.xml
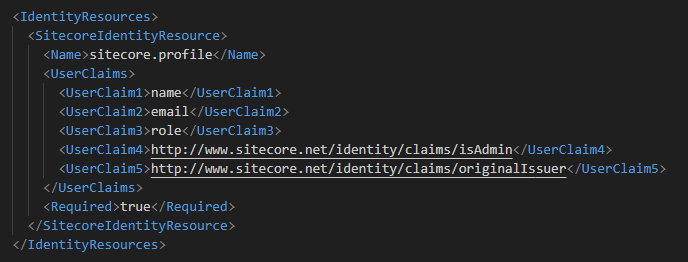
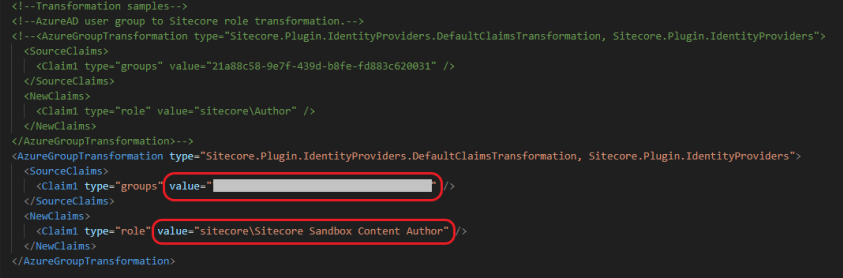
8. Map Azure AD Groups to Sitecore Security Roles
Now that we have Azure AD enabled, we need to map the Azure AD groups the corresponding security roles in Sitecore. This is called claims transformation- read up more on this here. The default sitecore.profile scope contains the following claims:
<your-identity-server-root>\sitecore\Sitecore.Plugin.IdentityServer\Config\identityserver.xml
To add our AD group to Sitecore security role mapping, we'll modify the same file as step 8:
<your-identity-server-root>\sitecore\Sitecore.Plugin.IdentityProvider.AzureAd\Config\Sitecore.Plugin.IdentityProvider.AzureAd.xml
Notice that the file has some Transformation Samples commented out- one for Sitecore role transformation, and the other for Sitecore admin user transformation. Create a a copy of the Sitecore role transformation section.
Update the claim type "groups" value to the Object ID of the new Azure AD Group we created in step 5:
Update the claim type "role" value to your corresponding Sitecore security role:
We also want to map the name of the user in addition to the email, add the following new section to the same file as above:
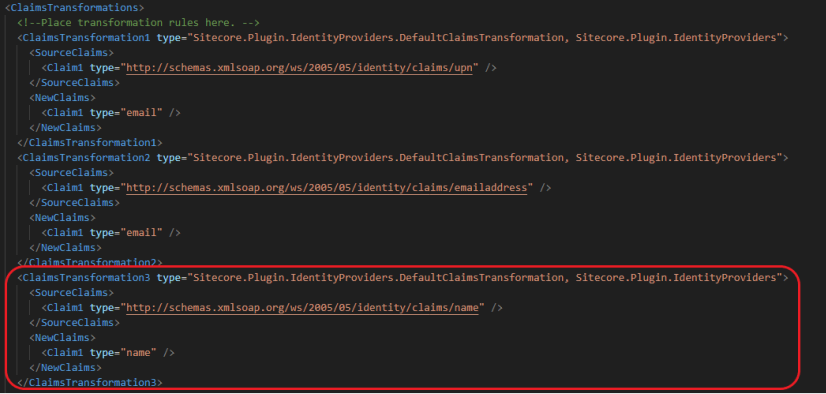
<ClaimsTransformation3 type="Sitecore.Plugin.IdentityProviders.DefaultClaimsTransformation, Sitecore.Plugin.IdentityProviders">
  <SourceClaims>
	<Claim1 type="http://schemas.xmlsoap.org/ws/2005/05/identity/claims/name" />
  </SourceClaims>
  <NewClaims>
	<Claim1 type="name" />
  </NewClaims>
</ClaimsTransformation3>
Sitecore Content Management
9. Map Identity Claims to Sitecore User Profiles
The final step is to map the identity claims to the properties on the Sitecore user profiles. Navigate to the following file:
<your-sitecore-cm-instance>\App_Config\Sitecore\Owin.Authentication.IdentityServer\Sitecore.Owin.Authentication.IdentityServer.config
You'll see a section called propertyInitializer. Add new sections here to map the email and name property (create a Sitecore config patch file for this):
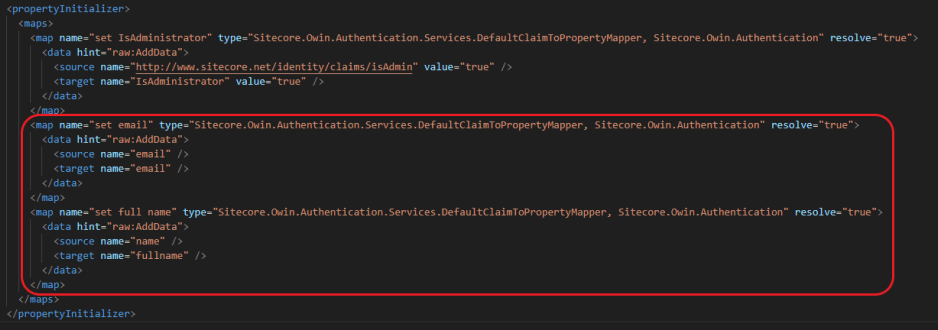
<map name="set email" type="Sitecore.Owin.Authentication.Services.DefaultClaimToPropertyMapper, Sitecore.Owin.Authentication" resolve="true">
	<data hint="raw:AddData">
	  <source name="email" />
	  <target name="email" />
	</data>
  </map>
  <map name="set full name" type="Sitecore.Owin.Authentication.Services.DefaultClaimToPropertyMapper, Sitecore.Owin.Authentication" resolve="true">
	<data hint="raw:AddData">
	  <source name="name" />
	  <target name="fullname" />
	</data>
</map>10. Restart Identity Server
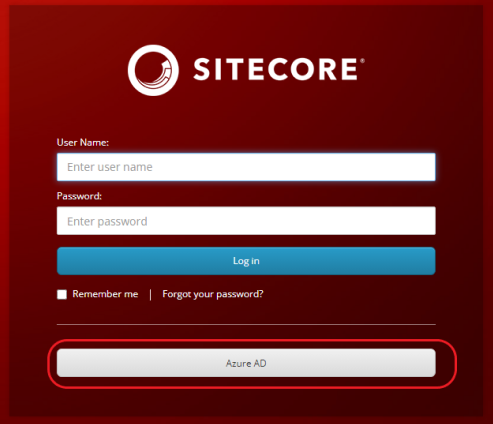
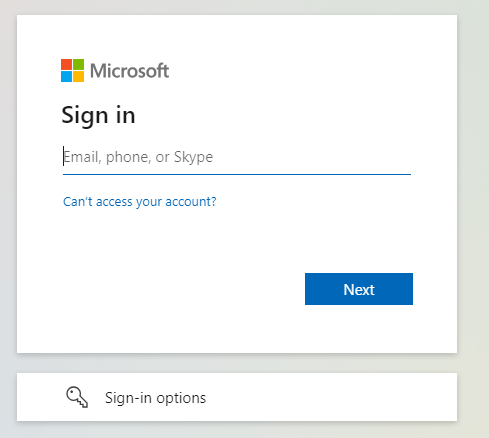
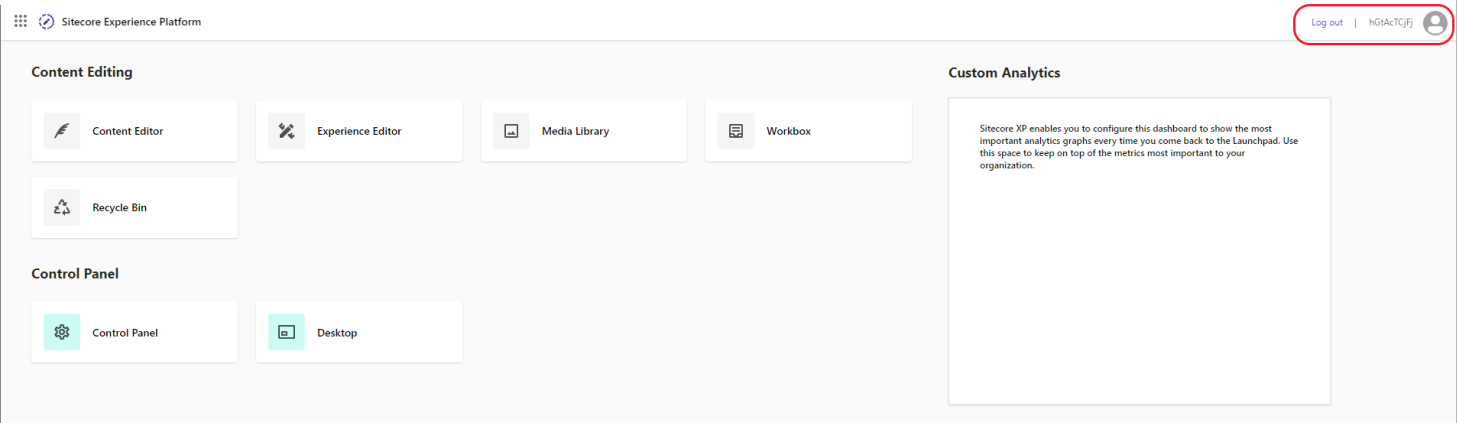
And that's a wrap! Restart your Identity Server before testing. You should now be able to login with Azure AD: