
How to Deploy Next.js Commerce Storefront with Vercel Sitecore OrderCloud Integration in 5 Easy Steps

In this post, I'll walk you through how you can build and deploy Next.js Commerce storefront with Vercel using Vercel's Sitecore OrderCloud integration.
Next.js Commerce is a React starter kit for high performance ecommerce sites. It is optimised for production and supports Static Site Generation (SSG), Server Side Rendering (SSR) and incremental static regeneration among other things. It provides a starting point to build and fully customise your own ecommerce storefront. More details can be found here and source code can be found here.
Vercel is a platform for frontend frameworks and static sites which makes it easy for teams to develop, preview, deploy, and scale websites built with headless content and commerce platforms. More details can be found here.
Sitecore OrderCloud is a cloud based, API-first, headless ecommerce platform for B2B, B2C, and B2X that process over 25 million transactions and over $5 billion in revenue annually. Further information can be found here, here and here.
Let's get to it...
1. Create OrderCloud Account
Head over here to create your free OrderCloud portal account.
2. Create Vercel account
Create a Vercel account over here. You can start with a Hobby account which is free for non-commercial & hobby sites.
3. Create new Next.js Commerce project.
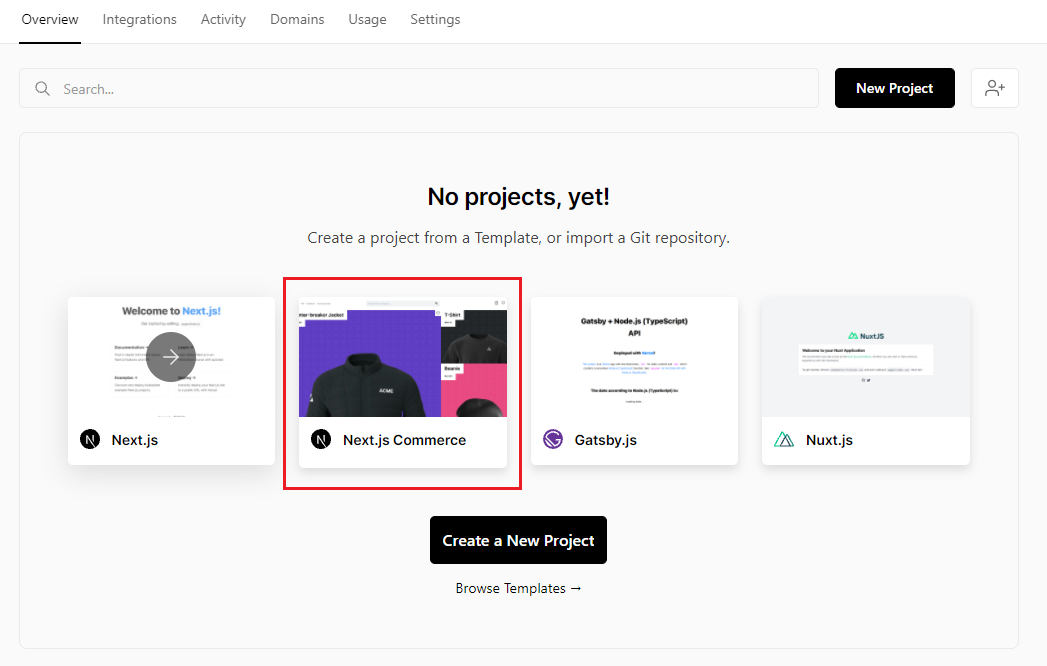
So you've created your Sitecore OrderCloud and Vercel accounts. Next up, you need to create a new project in Vercel. Go to the Overview tab and click on the Next.js Commerce tile to start the project creation wizard.
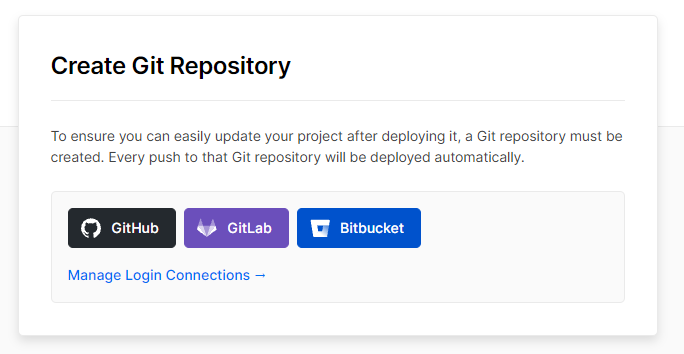
Create Git Repository
The first step in the wizard is to create a Git repository for your project which cloned from the Next.js Commerce repository. For this, you need to connect Vercel to your Git platform of choice. I used GitHub, but you can use also GitLab or Bitbucket. Note that you choose to create either a public or private repository.
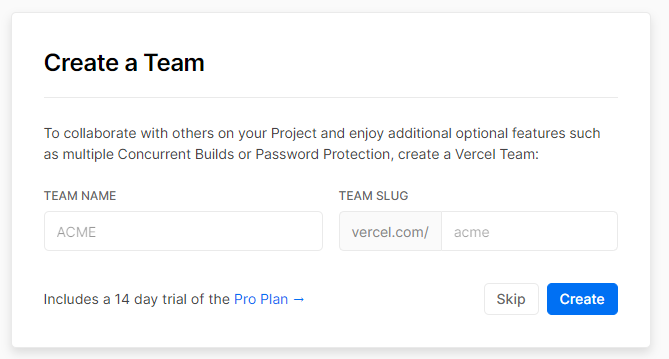
Create a Team (Optional)
Next up, you can choose to create a team if you want to collaborate with others on the project. Note that you need to be on at least a pro plan if you want this feature. I'll skip this for now.
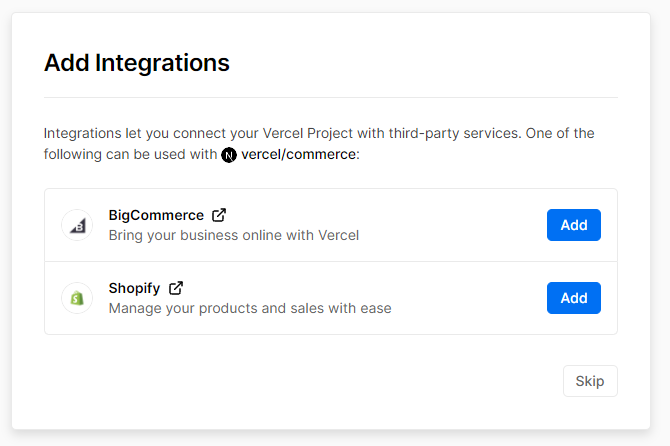
Add Integrations (Optional)
Note that you don't see the OrderCloud integration here in the list of integrations. Don't worry about this and skip for now. We will add the integration separately after the project is created.
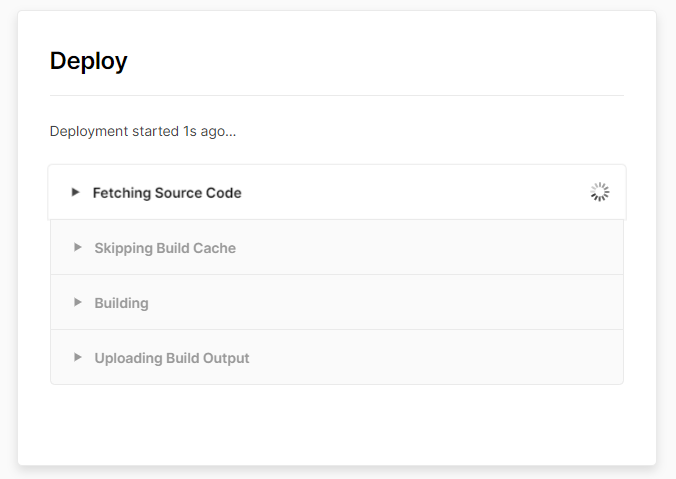
Deploy
The final step will perform all the tasks needed to create your project, clone the Next.js Commerce repository to your own repository, build & deploy the project and generate URLs to access the storefront.
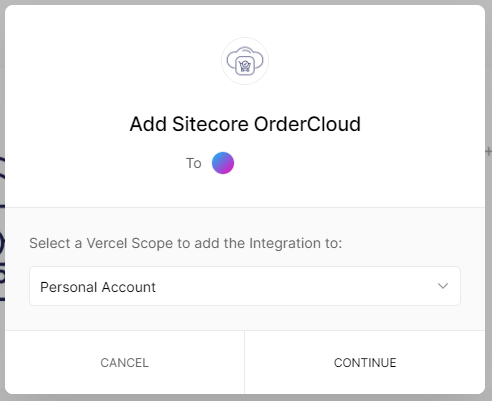
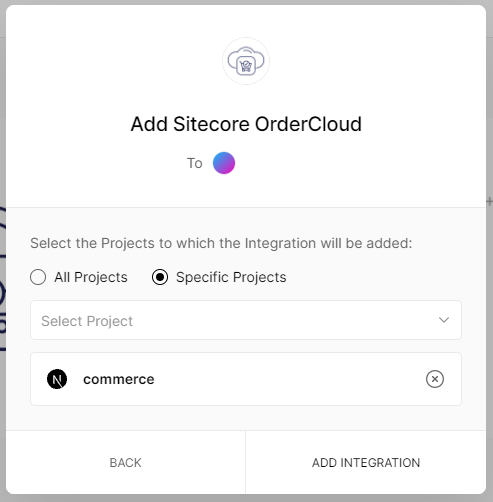
4. Add Sitecore OrderCloud Integration
Now that your project has been created, it's time to add the Sitecore OrderCloud integration to the Next.js Commerce storefront. You can do this from the Sitecore OrderCloud integration available in the Integrations Marketplace.

Adding the integration will take you through the following steps in the wizard:
Select Vercel Scope
Select your account from the list.
Select Project
Next up, you need to select the project that you just created earlier to add the integration to it.
Login and Add Integration to OrderCloud
In the final step of the wizard, you'll be prompted to login to your Sitecore OrderCloud account created earlier and connect your project. This step will also create a new Marketplace in OrderCloud and seed it with sample data.
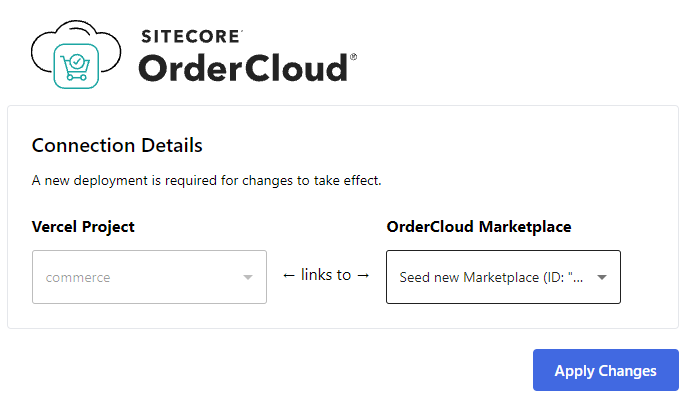
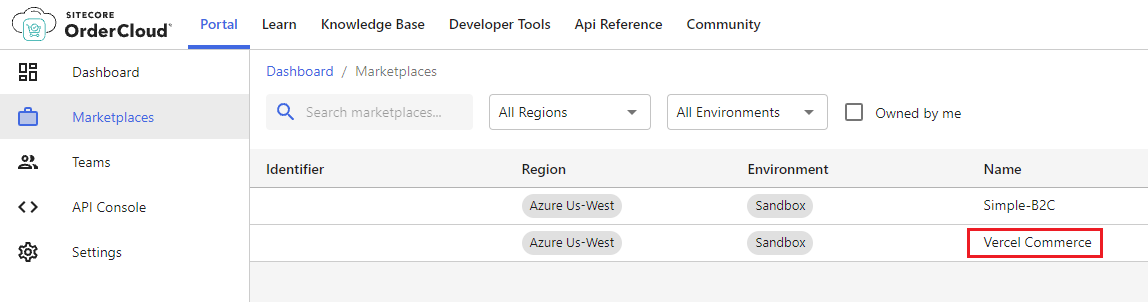
Once the integration has been added, head over to the OrderCloud portal and verify that the new marketplace has been created:
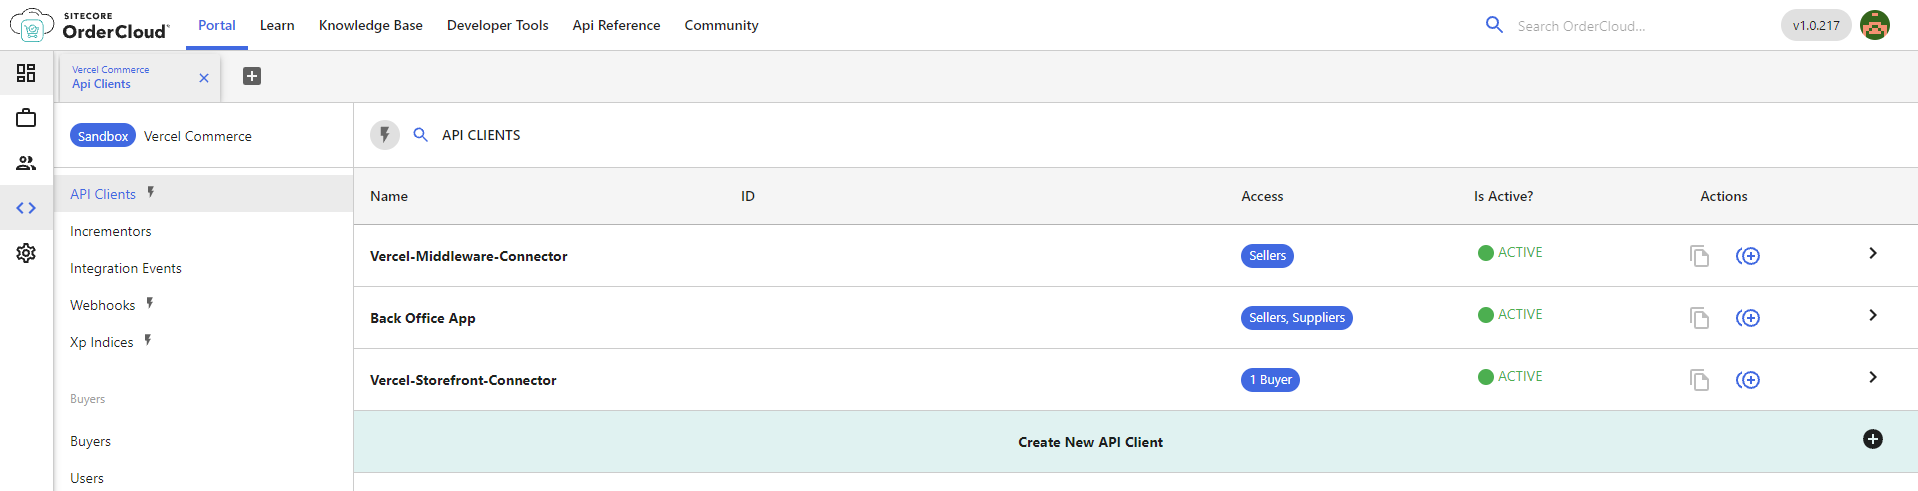
Note that the integration also creates the required API clients. This can be verified by getting a list of API clients via the API console in the OrderCloud portal:
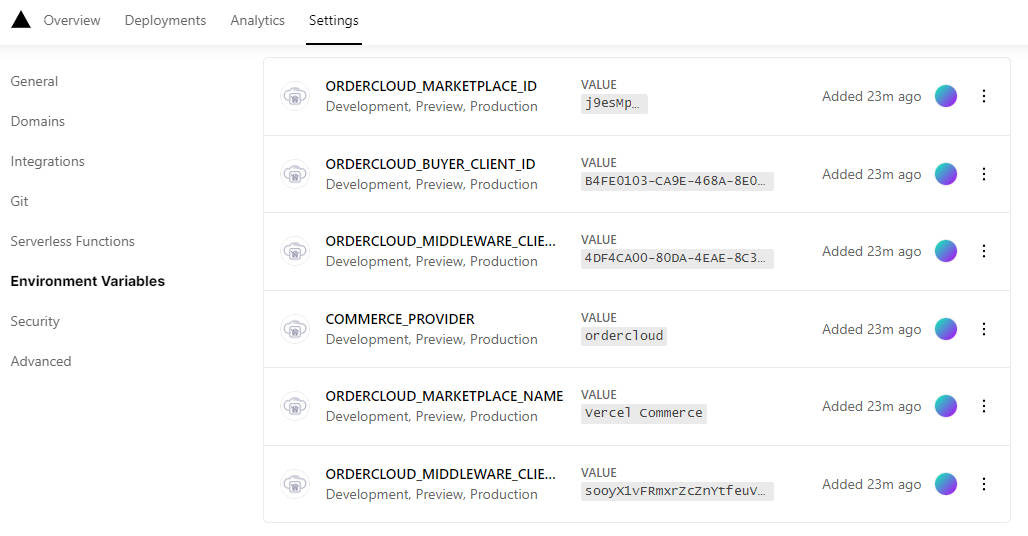
Configuration details for the OrderCloud APIs are also added to the project environment variables in Vercel. You can find these under project settings:
Configure Stripe Secret Key
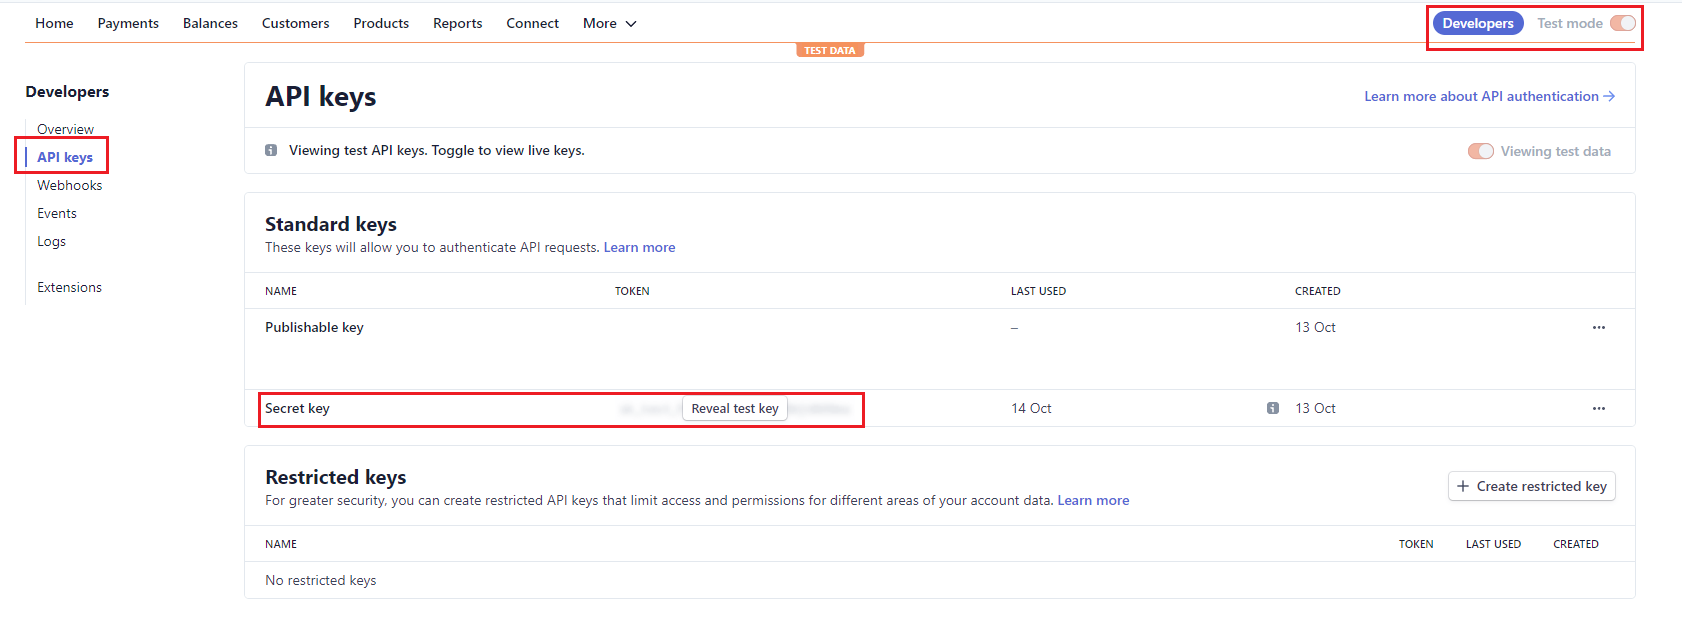
You'll need to add a Stripe secret key for payment integration. If you don't have a Stripe account already, create one here. Once you've created your account, go to the API Keys section in the Developers tab to get the Secret key:
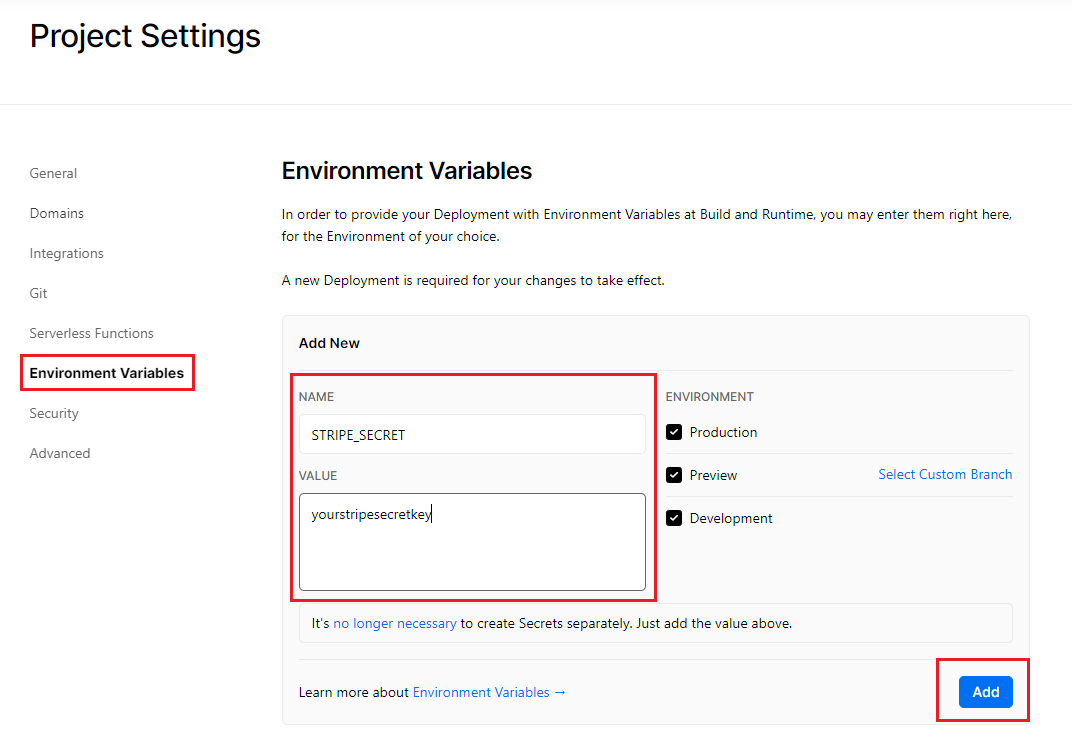
Next, you need to add a new environment variable called STRIPE_SECRET to your project in Vercel under project settings:
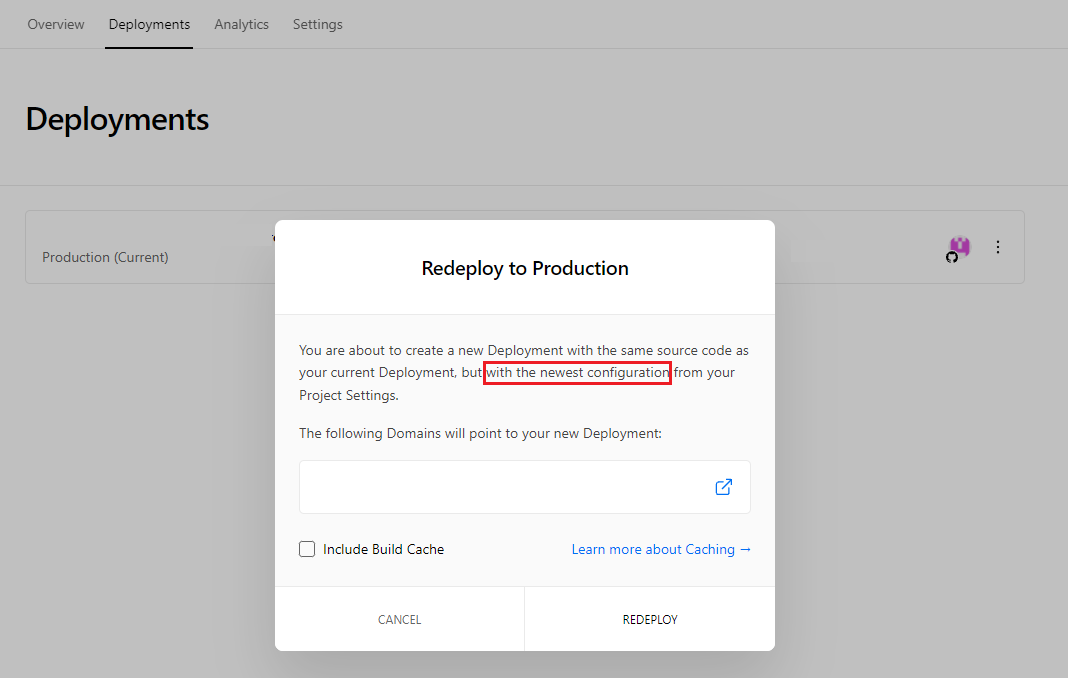
5. Redeploy Vercel Project
Finally, you will need to redeploy your project for the integration to be completed. Go to the deployments section of your Vercel project and select 'Redeploy to Production':
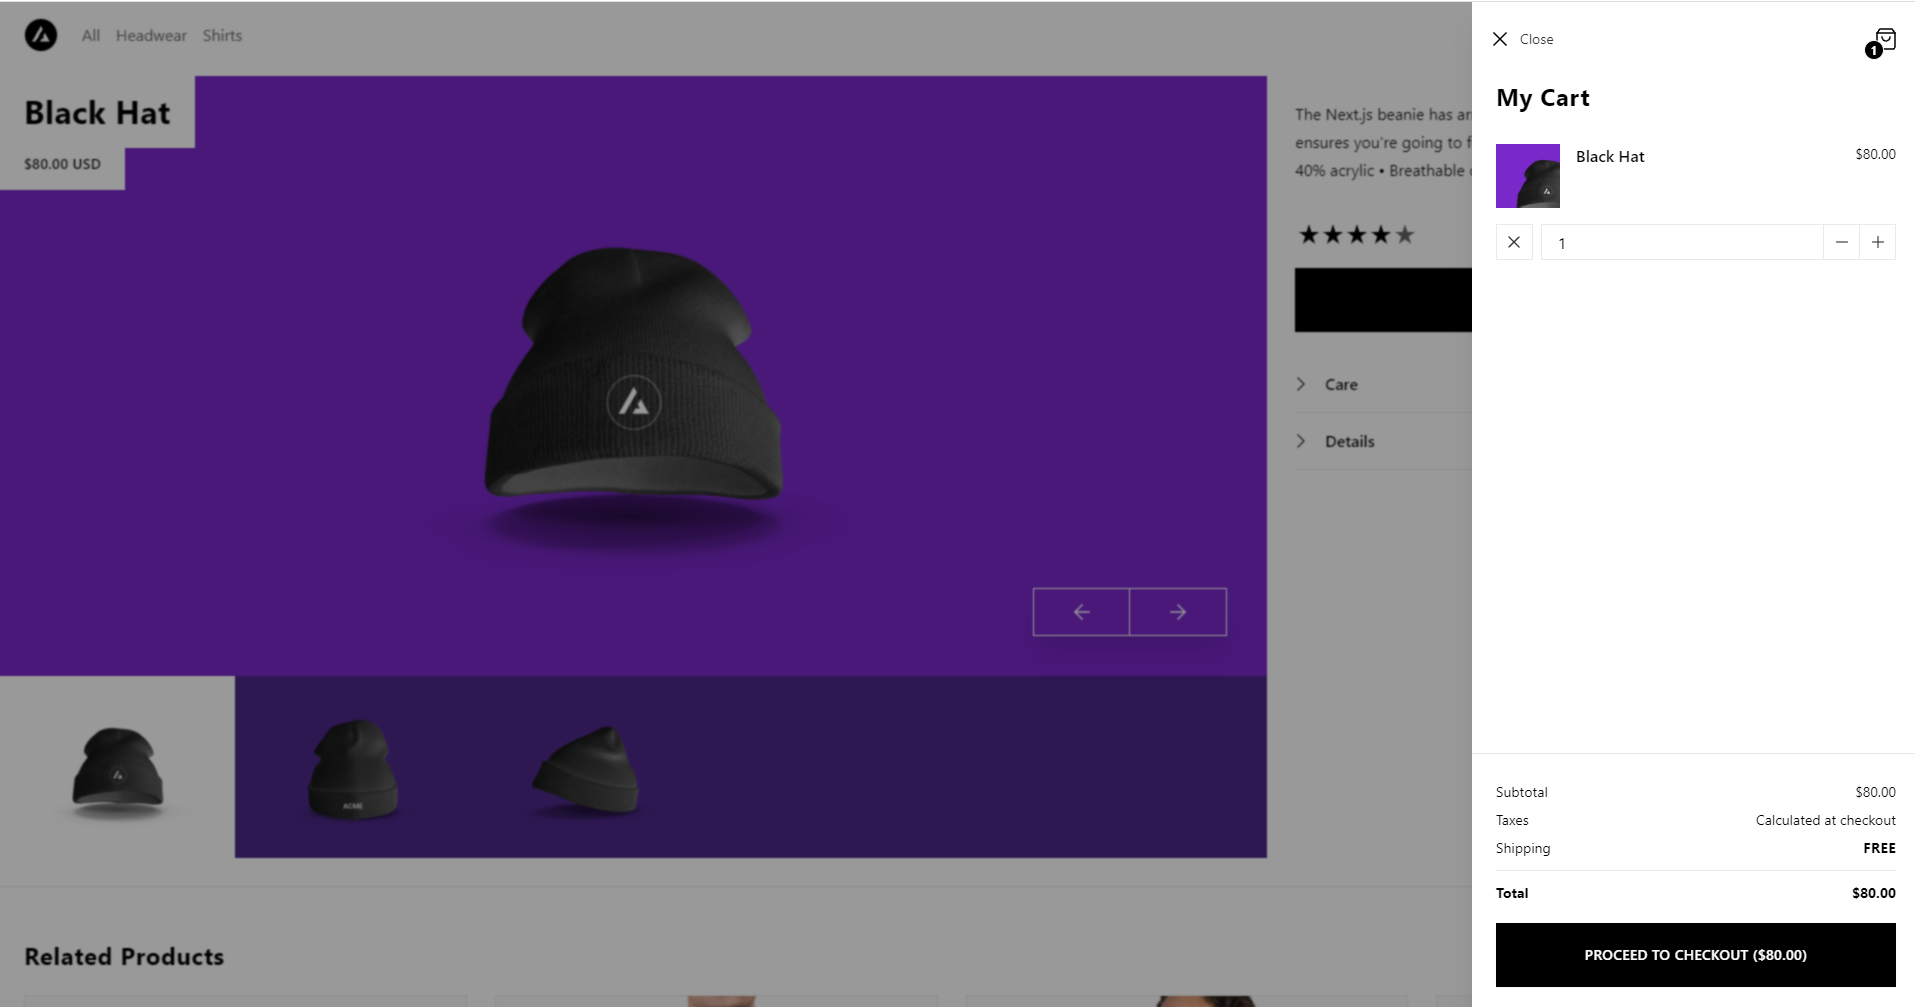
Voila! You have your storefront up and running in no time:
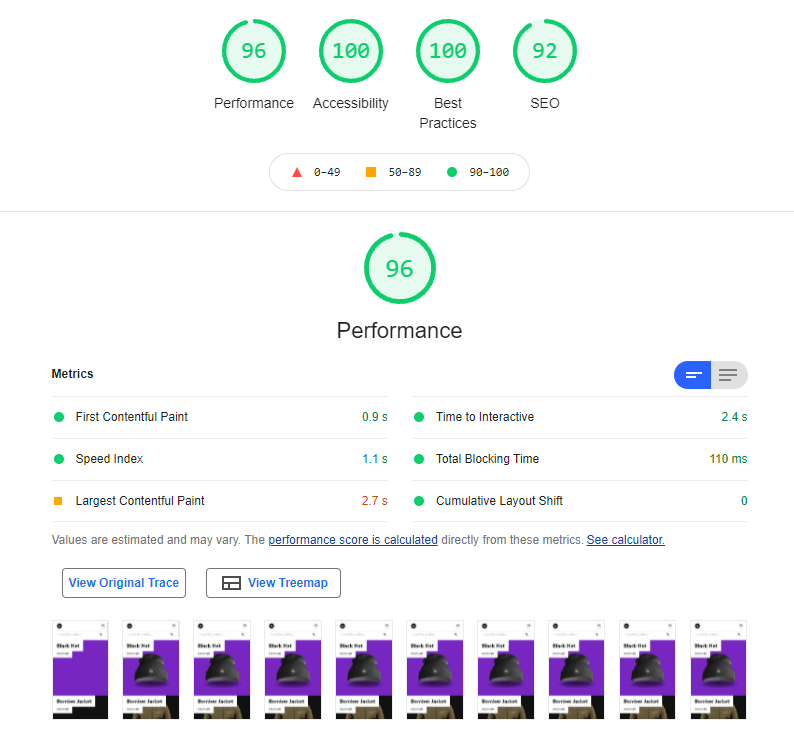
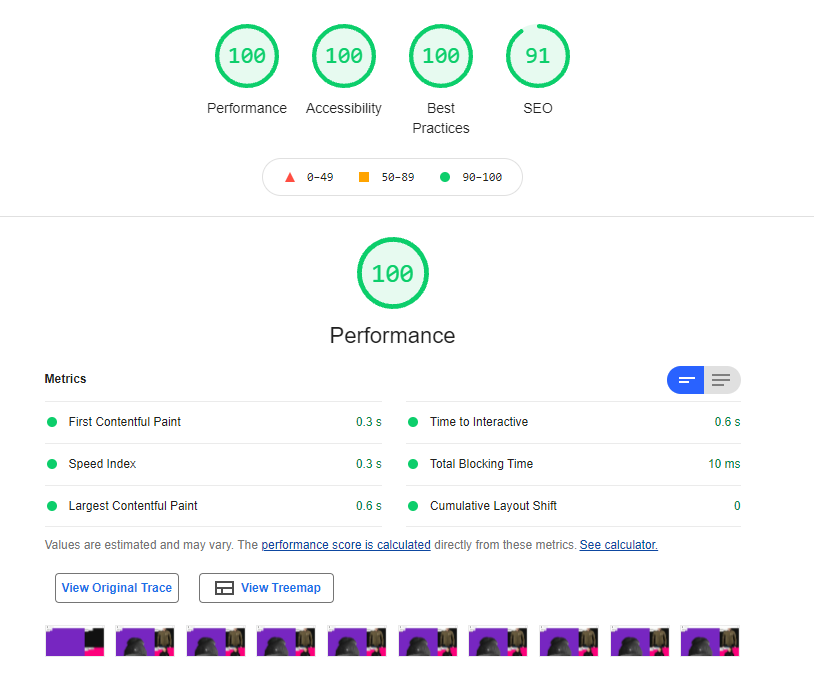
And it's seriously fast...
Google Lighthouse results for Mobile
Google Lighthouse results for Desktop
Hope you found this guide useful! In an upcoming post, I'll deep dive into details of the integration and talk about how you can start customising your storefront and OrderCloud setup. Till then...